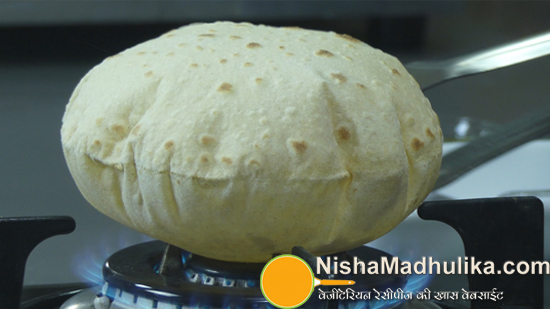
Phulka, Chapati or Roti | How to make Chapati - step by step recipe
- Nisha Madhulika |
- 24,237 times read

People often have a question on How to make soft and fluffy poori. Here we bring you an easy way to make soft and fluffy poori.
हिंदी में पढ़िए - नर्म फूली फूली रोटी | Phulka, Chapati or Roti | How to make Chapati - step by step recipe
Ingredients for Fulka, chapati , roti
- Wheat flour – 2 cups (300 grams)
- Salt – ½ tsp or to taste
- Oil – 2 tsp
- Ghee – 2 to 3 tbsp
- Wheat flour – 1 cup (150 grams) (for dusting)
How to make chapati - step by step recipe
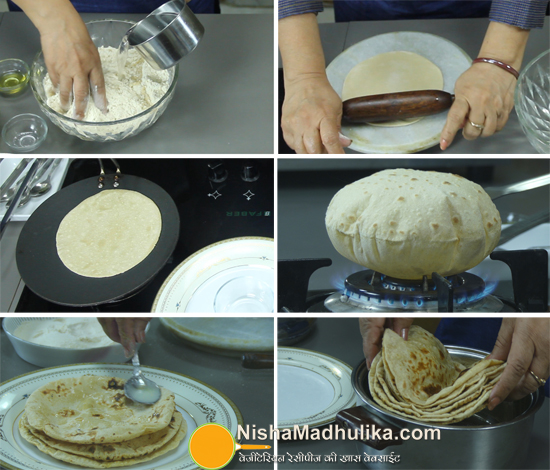
Take wheat flour, ½ teaspoon salt in a big mixing bowl. Then add 1 tsp of oil to flour. Mix well and then add water in little portions to prepare soft dough. Avoid adding much water to the flour all at once.
Firstly bind the wheat flour well and gradually press and smoothen it. Turn the dough and knead it well with your fist. Knead the dough well for 3 to 4 minutes until it smoothes. If the dough is still stiff, add water accordingly. The dough is ready, cover and keep it aside for 20 minutes to set.
After 20 minutes are done, grease your hands with some oil and smoothen the dough again to make it soft. The soft and smooth dough is now done and ready. Let’s prepare chapattis now.To make chapattis, take small lumps from the dough. The size of chapattis can be big or small as desired. Roll the lump into a round dough ball and flatten it a little. Now dust the dough ball with some dry wheat flour and start rolling out the chapatti thinly with 6 to 7 inch diameter. When the chapatti sticks to the rolling board, dust the chapatti with wheat flour again and roll out thin chapattis. Meanwhile heat a tawa on flame for roasting the chapattis.
Meanwhile put a skillet to heat. Gently lift the roti from the rolling board and place it on the tawa. Let the chapatti roast a little from beneath. Chapatti is roasted from beneath as it has turned little dark on the surface. Now flip the side and let it roast until it gets little brown spots beneath.

When you can little brown spots on this side, roast the chapatti directly on the flame.Flip the chapatti and very carefully roast it making sure it doesn’t burn.
Immediately take off the chapatti from flame when it gets brown spots and place on the bowl kept above the plate. If you place it directly on the plate it will turn soggy from beneath. Likewise prepare rest of the chapattis as well.
Apply some ghee on the roasted chapattis. For this, pour some ghee over it and rub the chapattis to each other to spread the ghee evenly.
For roasting chapattis on the tawa, roast the roti on both the sides then flip the side and press down with a ladle until it puffs up and brown spots appear.
You can also store the chapattis directly inside the casserole. Spread a foil sheet or thick cotton napkins inside the casserole. Place the chapattis inside the casserole and cover. Store the chapattis immediately inside the casserole but keep it open until the chapattis cool down.
Serve these steaming hot chapattis with any Indian curry or stir fried sabzi as well your taste and enjoy your meals.
Suggestions:
Adding salt and oil to the flour while is optional. Though, a little salt in the rotis give a better taste and adding oil makes the rotis soft.
To prepare dough, use half the quantity of water than the dough. Take 1 cup of water for 2 cups of wheat flour but the quantity of water used differs as according to the type of wheat flour used.
Roll out the chapatti from the sides and not from the centre because if rolled from the centre the chapatti flattens at the centre and remains thick on the sides.
To store the leftover dough, place it in a container and apply some ghee or oil over it. This helps dough from turning black and keeps the dough soft as well for the second day. Do not store the dough for more than 24 hours.
Roti Phulka or Chapati | नर्म फूली फूली रोटी | How to make Chapati - step by step recipe
Tags
- Phulka
- Chapati or Roti recipe
- How to make Phulka
- Chapati or Roti
- How to make Chapati - step by step recipe
Categories
Please rate this recipe:


thanks madam, nice explanation of a simple basic recipe